 Save
Save My neighbor showed up at my door with a box of these emerald-themed cake pops last March, and I couldn't stop eating them—the way the black coating cracked between your teeth, then melted into chocolate, with little pops of gold leaf catching the light. She laughed when she caught me sneaking a third one and said they were easier than they looked, just a little patience and some melted candy. That conversation led to me experimenting in my own kitchen, discovering that the real magic wasn't the gold on top but how the frosting-and-cake ratio had to be just right or the whole structure would collapse during dipping.
I made these for my daughter's St. Patrick's Day potluck at school, and watching her face light up when the teacher set them on the table—like she'd brought actual treasure—made me understand why people get so excited about holiday baking. One kid asked if the gold was real, and another boy immediately claimed three for his friends, which felt like the highest compliment.
Ingredients
- 1 box (400 g) chocolate cake mix plus required additions: The foundation of everything—don't skip the cooling step because warm cake won't crumble properly and your mixture will be greasy instead of workable.
- 120 g (½ cup) chocolate frosting: This is the adhesive that holds your cake crumbles together; store-bought works perfectly and saves time, though homemade tastes richer if you have it on hand.
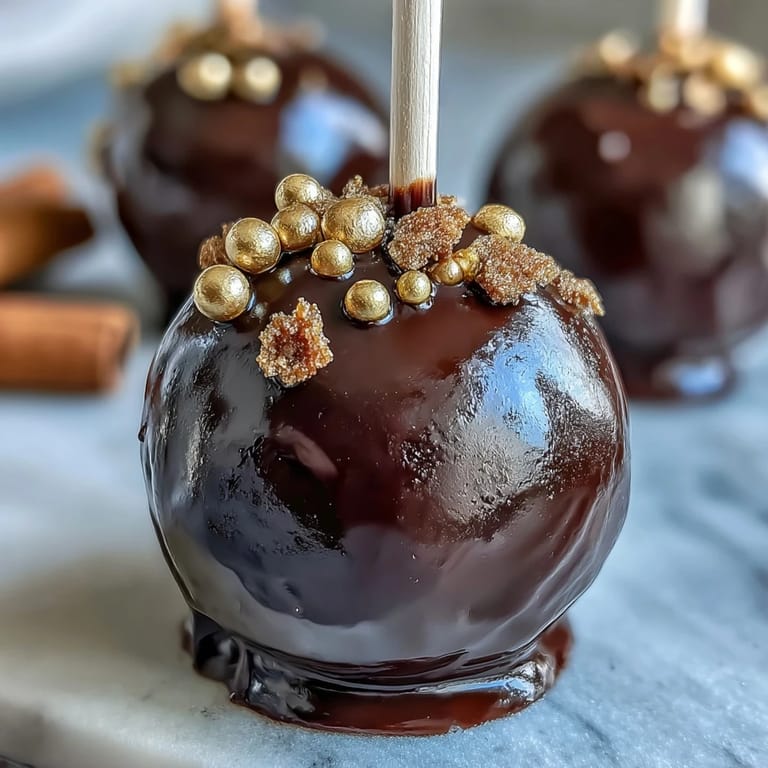
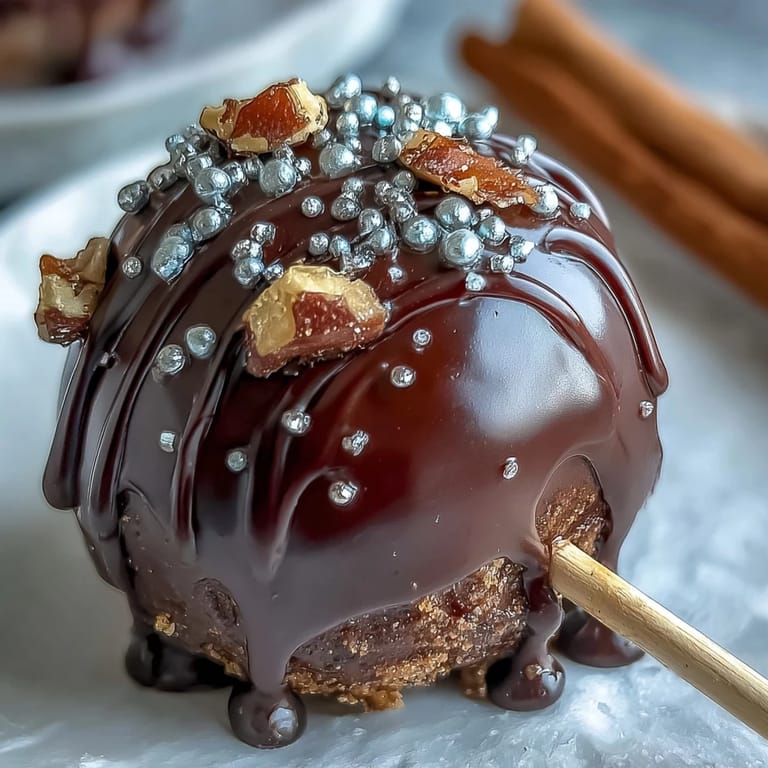
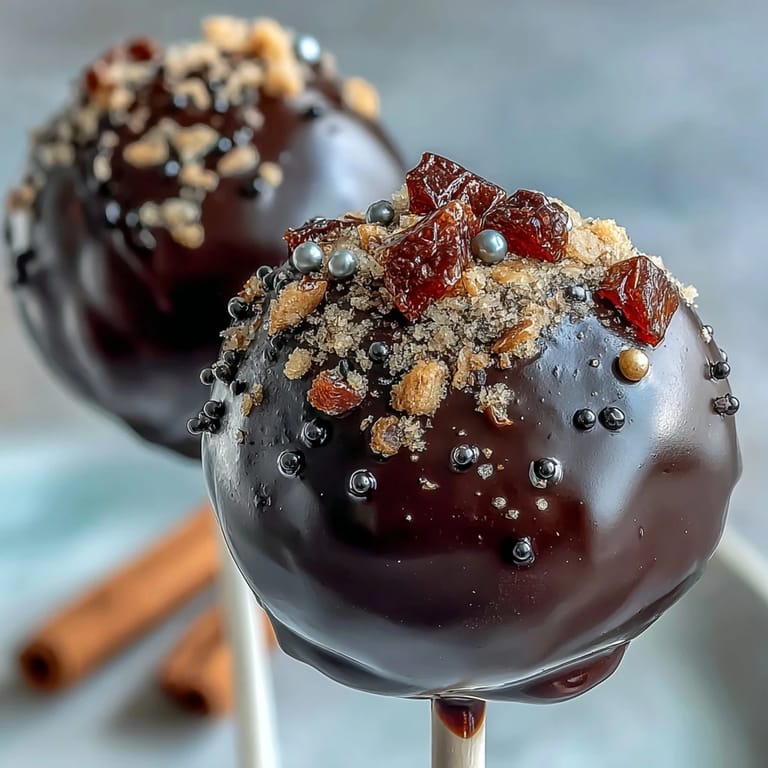
- 400 g (14 oz) black candy melts: The outside coating that transforms your cake balls into tiny pots; melt them slowly to avoid seizing, and have extra on hand because some always sticks to the bowl.
- 48 g (2 oz) gold sprinkles or edible gold pearls: What makes these genuinely special—the gold catches light and makes each pop feel celebratory, worth the splurge on quality sprinkles.
- 24 lollipop sticks: Your structural support; inserting them halfway gives you something to hold without destabilizing the whole pop.
- 50 g (1.75 oz) white candy melts (optional): For piping delicate rims or accents if you want to get fancy—perfectly skippable but fun for decoration.
- Green fondant or sprinkles (optional): Small shamrock touches that add visual personality without being necessary.
Tired of Takeout? 🥡
Get 10 meals you can make faster than delivery arrives. Seriously.
One email. No spam. Unsubscribe anytime.
Instructions
- Bake and cool your cake:
- Follow the box instructions and bake until a toothpick comes out clean, then let it cool completely on the counter—this is non-negotiable because warm cake won't crumble right and will clump unevenly. Rushing this step is how you end up with frosting-heavy, soggy pops instead of ones that hold their shape.
- Crumble and mix:
- Once cool, break the cake into pieces and crumble it between your hands into a large bowl until it looks like fine sand with no large chunks. Add your chocolate frosting gradually, mixing with your hands (it's easier than a spoon) until the texture is like a thick cookie dough that holds together when squeezed.
- Roll and chill:
- Scoop the mixture with a small ice cream scoop or spoon into balls about the size of walnuts, then roll them smooth between your palms. Flatten the tops slightly to mimic a pot shape, place them on parchment, and refrigerate for at least thirty minutes—cold cake pops dip and hold their shape beautifully.
- Prepare your sticks:
- Melt your black candy melts in a microwave-safe bowl in thirty-second bursts, stirring between each one so they don't burn. Dip just the tip of each lollipop stick into the melted coating, then insert it halfway into a chilled cake pop at a slight angle—this anchors it without piercing all the way through.
- Set the sticks:
- Pop your stick-inserted pops back into the fridge for ten minutes so the coating hardens and your stick doesn't slide around during the full dip. This small pause prevents the disaster of sticks rotating inside cake pops mid-decorating.
- Dip and decorate:
- Reheat your black candy melts until they're fluid, then dip each pop completely while holding the stick, letting excess drip back into the bowl. Immediately stand it upright in a styrofoam block or cake pop stand, then scatter gold sprinkles over the wet coating so they stick—timing is everything here because once the chocolate starts setting, the sprinkles won't adhere.
- Add final touches:
- Once the black coating has set slightly but not completely, pipe thin lines of white or black candy melts around the rim of each pot if you want definition. You can also add tiny green fondant shamrocks now, or let them set completely and skip the extras if you prefer simplicity.
- Final set and serve:
- Let everything harden completely at room temperature before moving them to a box or serving platter—this takes about thirty minutes but makes sure nothing smudges or cracks.
 Save
Save There's a specific moment when you pull a fresh pot of gold from the melted candy and watch it gleam in the light—that's when baking stops feeling like a task and starts feeling like you've made something genuinely magical. My niece called them the "treasure pops" for an entire month, and I couldn't have paid for better marketing.
The Cake Ball Foundation
The secret to professional-looking cake pops that don't fall apart starts with respecting the crumble-and-frosting mixture—it needs to be firm enough to hold shape but moist enough to roll smoothly. I learned this the hard way by trying to rush the cooling stage and ended up with oily balls that wouldn't hold together no matter how much frosting I added. The second time, I let the cake rest overnight in an airtight container and the texture was completely different—drier, easier to work with, and the final pops had better structural integrity.
Melting and Dipping Technique
Candy melts seem simple until you realize they can seize, split, or turn grainy in seconds if you're not paying attention—slow microwave heat in short bursts is genuinely the way to keep them smooth and workable. I watched a friend try to melt them on the stovetop once and it was a disaster of clumpy, broken chocolate within minutes. Now I'm evangelical about the microwave method, thirty seconds at a time with a good stir, and it's never failed me.
Storage and Make-Ahead Strategy
These cake pops are genuinely one of the most make-ahead-friendly desserts I've found—you can complete them three days early and they sit in a box looking perfect, which is huge when you're managing holiday entertaining.
- Store them in an airtight container at room temperature away from direct sunlight so the candy coating doesn't dull.
- If you need to make them even further ahead, freeze the uncoated crumbles in a bag and dip them fresh on party day for the shiniest finish.
- Never refrigerate finished pops because condensation will make the coating weep and look sad—room temperature is your friend.
 Save
Save These pots of gold are the kind of dessert that makes people ask for the recipe and then marvel that they ever seemed complicated—they're really just chocolate cake, frosting, and the confidence to dip something on a stick. Make them once and you'll absolutely make them again.
Recipe Questions & Answers
- → How do I shape the cake balls to look like pots?
After mixing cake crumbs and frosting, roll into balls and slightly flatten the top to resemble a pot shape before chilling.
- → What’s the best way to insert the sticks securely?
Dip the tip of each stick into melted candy melts before inserting halfway into chilled cake balls; this helps the sticks set firmly.
- → Can I use different candy melts for decoration?
Yes, black candy melts are used for coating but white melts can add accent details before coating sets.
- → How should these be stored to maintain freshness?
Keep the treats in an airtight container at room temperature for up to three days for best taste and texture.
- → Is there a gluten-free option?
Use a gluten-free cake mix and verify all decorative ingredients are gluten-free to accommodate dietary needs.